
I have always loved the taste of sourdough bread! With its rich flavors, satisfyingly crunchy crust and soft core, it’s a bread that feels both rustic and special. The secret behind making this bread and many other delicious sourdough products is sourdough starter. Sourdough starter is truly an incredible ingredient, it can produce complex flavors and it has plenty of uses in everyday cooking, besides bread.
I find the science behind this also fascinating! This ingredient is your personal symbiotic culture of good yeasts and bacteria and the two of you feed each other. Sourdough starter is made from naturally occurring yeasts and bacteria and the making process basically involves getting a hold of them and giving them an environment where they can thrive undisturbed!
Did you know?
Humanity did not fully understand yeast and how it works until quite recently. We have, however, been using it since thousands of years ago! At the very beginning, we even believed it was magic! If you want to learn more about it, check this dedicated post!

Fun fact!
Tens of types of Lactic Acid Bacteria and yeasts can be living in a sourdough starter. The exact blend, however, depends on several conditions: your choice flour and water, geographical location, storing temperature and place, storing method, and much more! For this reason, each sourdough starter is different, further contributing to the uniqueness the flavors it can create!
Do you know what else is great about it? You can make it at home!
Sourdough starter recipe
To start, we need to find the yeasts and bacteria we need to create a strong sourdough starter. Lucky for us, these are commonly found in wheat (and similar) flours! More specifically, these microorganisms usually live on the outer shell of wheat grains, and as a consequence they tend to be present in most commercial wheat flours, albeit in different quantities.
Choice of flour
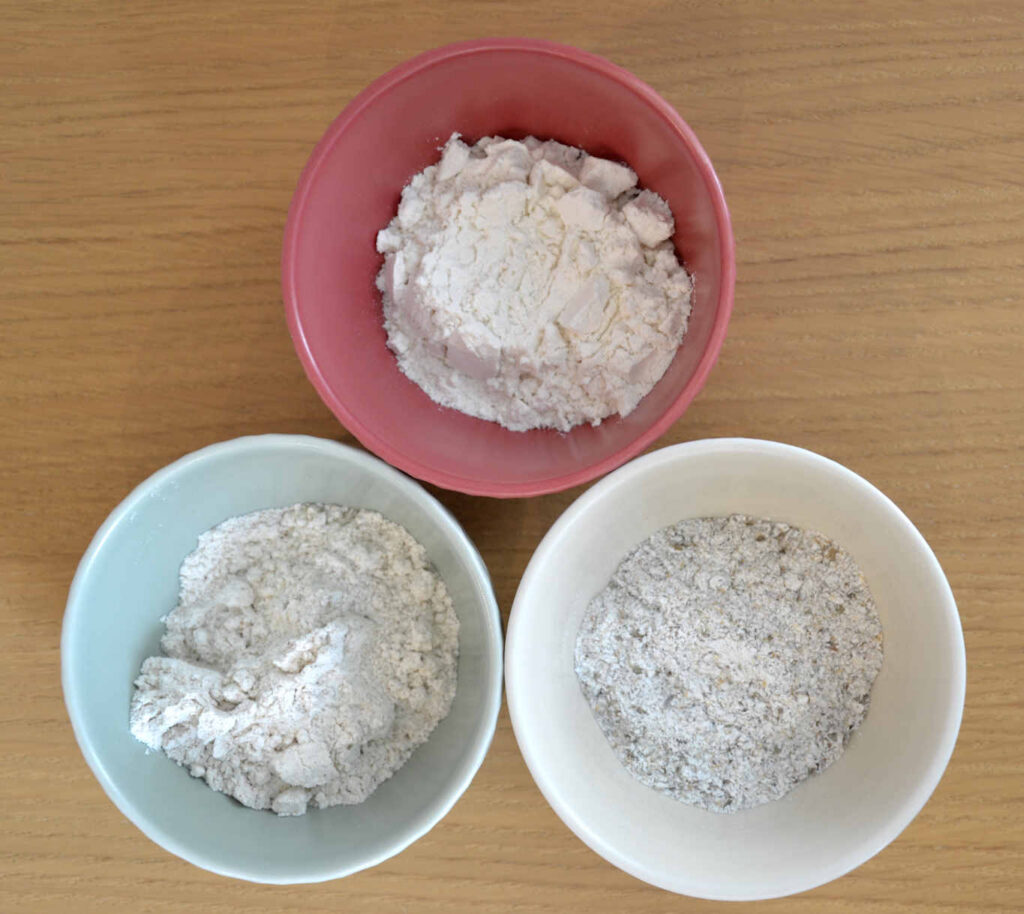
Your choice of flour is important! In fact, it will determine your chances of success and affect the time it takes to reach a usable starter. Different flours can also affect the taste of the resulting sourdough starter because they naturally house different microbial communities. Mind you, many of them contain the good species of bacteria and yeasts we are interested in, but the overall blends and specific types can be different, which in turn affects organoleptic properties of the result. Below are a few tips from my experience!
Bleached flours
You should avoid using bleached flour, as it contains the least amount of the bacteria we like. It’s possible to succeed using bleached flour, but chances are slim and it might take longer than using other flours, which can be discouraging. You can usually find out which flours are bleached by checking out the label. Some producers will clearly state “bleached” or “unbleached”, while some others will only list the typical compounds used for bleacking (benzoyl peroxide or chlorine dioxide) among the ingredients.
White (AP) flour
Normal, unbleached white flour (AP – all purpose) is viable and will yield faster results than its bleached counterpart. White flour typically contains the bacteria we are interested in by contamination, as it has been in contact with the broken wheat shells throughout the grinding process. A starter fed with white flour usually develops a milder taste with sometimes a slightly sour note.
Whole wheat flour
Whole wheat flour contains a higher amount of friendly yeasts and bacteria, given its direct content of grain shells. This tends to create a stronger smell and taste than a white flour starter, with a more noticeable sour taste. This is thanks to the fermentation byproducts of its prevalent bacteria;
Rye flour
Rye flour can yield even faster results thanks to its naturally rich microbial culture. You can have a sourdough starter made with only rye flour, but its consistency would be a bit different than what you’d expect from a flour (it’s more akin to a wet dense potato mash). If you like the taste of rye and want to try it out, I recommend using this in combination with either white or whole wheat flour. This way, your starter will have a more manageable consistency and you can enjoy the rich taste of rye!
Ingredients
Fundamentally, to make your own sourdough starter, you need only two ingredients: water and flour. The process itself is very easy and not time consuming, but it will take anywhere from a couple of weeks to more than a month to get to a point where you are able to start experimenting with your sourdough starter for cooking! This is because the natural yeasts and bacteria we need start out as a minority and need time to take over the whole starter and become a strong culture.
Ingredients (per feeding)
30 grams of flour (or mix) of your choice
30 grams of water
Ingredients (per feeding)
1 oz. of flour (or mix) of your choice
1 oz. of water
As we said before, this is a process, so the ingredients listed above are what you will need both at the start and then each time we will do one feeding. At the beginning this will be once a day, but later on we will adjust them based on the activity of your sourdough starter. If you are undecided about which blend of flour to use, you can take inspiration from the ones I have used… or just try them all!
My choices of flour
Personally, I made myself three different starters! Why? Because I like to experiment and I couldn’t choose! These are the flours I used in each of them:
- Starter 1: 100% AP flour;
- Starter 2: 50% AP and 50% whole wheat flour;
- Starter 3: 20% rye and 80% whole wheat flour.
Day 1
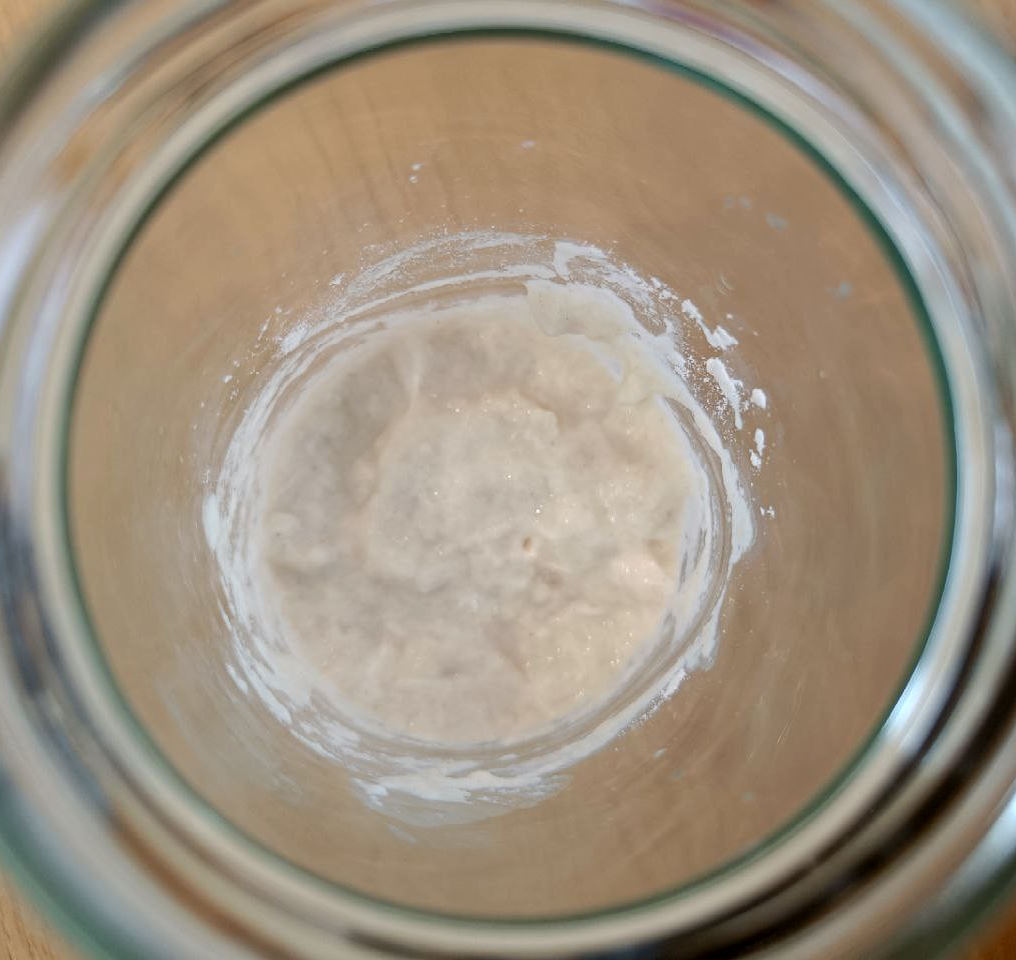
On the first day, all we need to do is mix the flour and the water inside a jar. We are mixing 50% water and 50% flour (in other words, a 1:1 proportion), so the expected consistency is the one of a dense pancake mix (see picture blow). It should not be too runny, but when moved it should settle down in 15-30 seconds or so. Depending on the flour you are using, it’s fine to slightly adjust quantities to achieve the right consistency. Don’t worry, this will not ruin your starter, it will work even if proportions are not exactly 1:1.
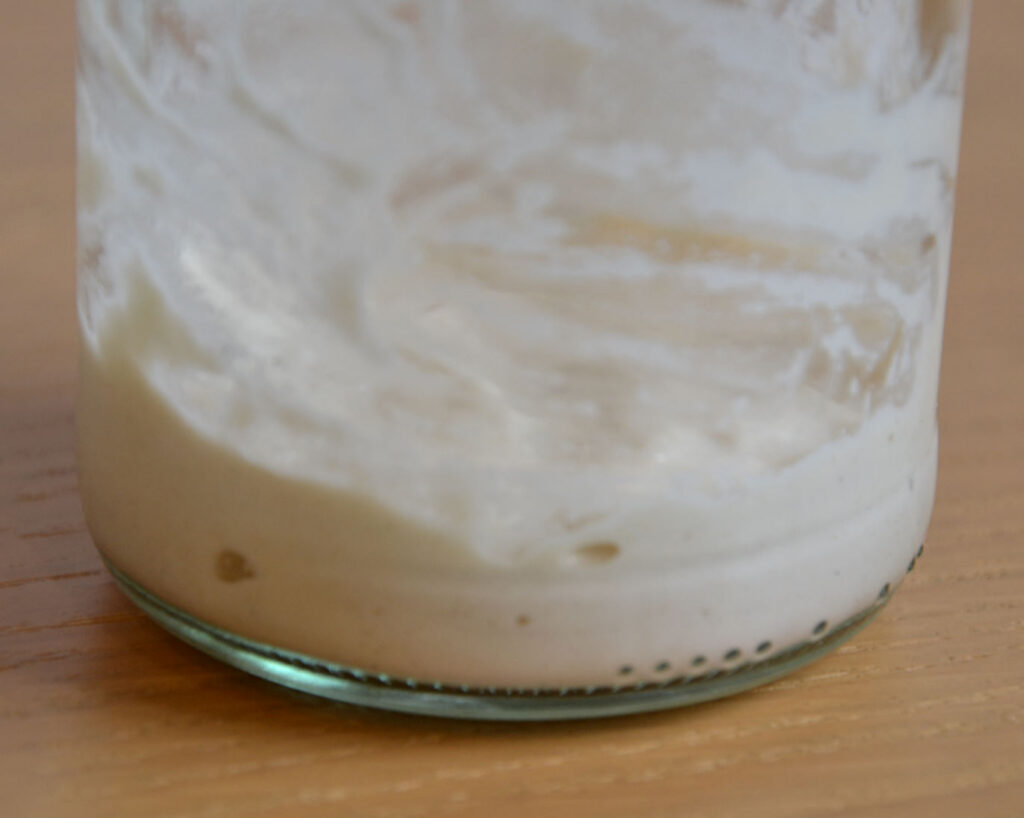
At this point, your starter needs to breathe, so you can loosely seal the jar. To facilitate some exchange of air, you can put a kitchen or paper towel between the lid and the jar. You can let your starter rest until tomorrow. Ideally, you should place it in a room with a temperature that is consistently between 20C and 28C (68F to 82F). Slighly colder temperatures can work too, but it might slow down the overall process.
Tip!
If you live in a cold place or don’t have a room with a consistent temperature, you can place your starter above your fridge or freezer for the colder parts of the day! This will be enough to keep it in the right temperature range! I don’t recommend, on the other hand, placing it on top of a strong heater, as this can sometimes be too warm and even cause it to dry up and die.
Understanding the sourdough’s hunger level
From here on, to guarantee the best results, it’s good to understand the signs that your starter will give you regarding its hunger level! You can typically tell the hunger level of your sourdough starter by judging its smell and sometimes through visual cues. Let’s go with order:
- A sourdough starter that is “full” (as in, not hungry) will smell similar to a normal loaf, with sometimes notes of sourness, depending on the composition of the starter itself;
- As your the bacteria and yeasts in your starter start lacking food (flour), they will become stressed. As a byproduct of their resulting fermentation, they might start producing acetone. This will give your starter a smell of vinegar. This is a sign that it could be time for a feeding;
- If your bacteria are really starving, they will start producing alcohol. The smell of vinegar will become stronger and feel more alcoholic. You might even get a visual cue at this point, and notice that a layer of liquid has formed on top of your starter. This is called hooch and is typically not harmful, as it’s just a mix of alcohol and water. This is your cue that it’s definitely time for a feeding. You can choose what to do with the hooch: some people like to pour it our and some just mix it back with the starter, before proceeding with a normal feeding.
At the beginning, you might not see any of these signs because your starter is still developing, but at this point it’s important to proceed with the scheduled feedings. Later on, we will instead start letting your yeasts and bacteria develop and allow them to tell us when they want to be fed.
Can the sourdough starter go bad?
Unfortunately, bad things can happen too. While we don’t wish for them, it’s good to keep in mind that if your sourdough starter starts presenting signs of mold, it’s best to discard it all, wash the jar very well and start over. Mold will usually show up as colored patches (white, pink, green, black, anything that is not the normal dough’s color, really) or even cover the entire surface of the starter. The same applies to the hooch, if it’s not transparent or at best slightly murky (meaning if it’s dark or colored), it’s best to start over to avoid any risks.
Day 2
On the second or third day, your starter might or might not rise. Both possibilities are entirely normal. If your starter does rise, this is due to bacterial activity, but these are not the bacteria we need in our starter. You can pretty much ignore this rise, they will eventually die out and leave space for the good yeasts and bacteria. After this first rise, your starter will look quite inactive for anywhere between a few days to a couple of weeks. Don’t let this discourage you, it will become really active once the good bacteria take over!
If 24 hours have passed since you created the starter on the first day, then you can proceed to your first feeding. Discard half of your starter and add again the same amount of flour and water listed above. At this point, your mix should weigh about 90g (3oz), but don’t worry if it’s slightly different, it’s okay as long as the consistency is right.
Days 3 to 10
Until day 10, you can continue with the same process every 24 hours. Always discard about half of what you had on the day before and then add the same amount of water and flour to the mix, eventually adjusting it to keep the right consistency.
Throughout this time, your starter might not rise yet (besides the first surge in activity due to the “bad” bacteria), and that’s perfectly normal. It doesn’t mean it’s dead; it simply means the wild yeasts and bacteria need more time to grow strong enough to lift the dough. Still, you should notice subtle signs of life: tiny bubbles forming inside the starter or on its surface. These small changes are encouraging indicators that the culture is developing as it should. The table below summarizes the approximate amounts you should follow:
| Starter (half of previous day) |
Water | Flour | Total (starter weight) |
|||||
|---|---|---|---|---|---|---|---|---|
| grams | oz. | grams | oz. | grams | oz. | grams | oz. | |
| Day 1 | / | / | 30 | 1 | 30 | 1 | 60 | 2 |
| Day 2 | 30 | 1 | 30 | 1 | 30 | 1 | 90 | 3 |
| Day 3 | 45 | 1.5 | 30 | 1 | 30 | 1 | 105 | 3.5 |
| Day 4 | ~52 | 1.75 | 30 | 1 | 30 | 1 | ~112 | 3.75 |
| Day 5 (and onwards) |
~60 | ~2 | 30 | 1 | 30 | 1 | ~120 | ~4 |
Day 11, until the starter is ready
From day 11, you can start feeding your starter every 2-3 days or whenever it is hungry, whichever comes first. You can refer to the dedicated section of the post if you are in doubt about the hunger level of your sourdough starter.
When your starter becomes stronger, it will start also rising. At first, it may rise just a little and it may take many hours or even a whole day. However, as it grows stronger it will start doubling, tripling or even quadrupling in size in the span of a few hours from the feeding!
Tip!
If you want to have a better sense of how much your starter is rising, you can put an elastic band around the jar at the level of the starter just after the feeding to use as reference point!
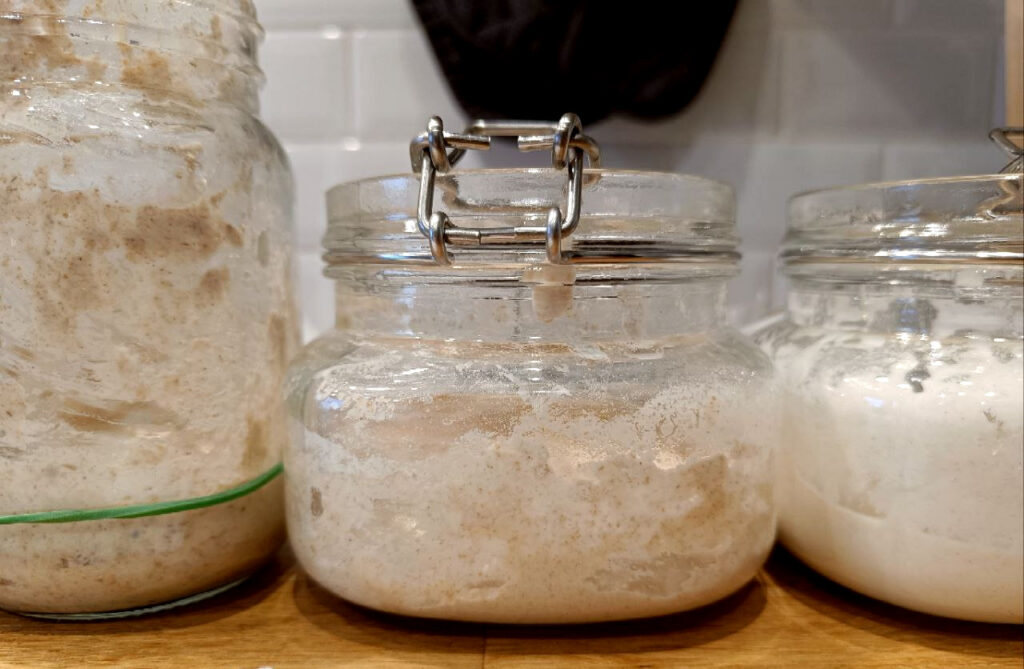
Rye + Whole Wheat (left), Whole Wheat + AP (middle) and pure AP (right)
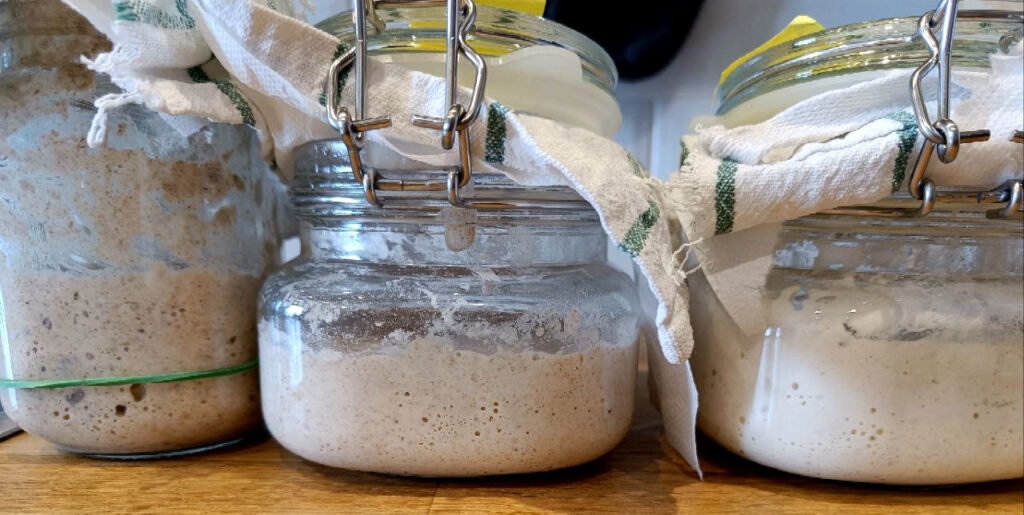
Your starter will be ready to use when, upon doing a 1:1:1 feeding, it consistently rises by more than double (ideally, even triple) its initial size within a few hours. It could take several more days or weeks to get to this point, so don’t get discouraged along the way! As long as your sourdough starter is showing signs of activity (such as bubbling), it is alive!
1:1:1 feeding – what is it?
A 1:1:1 (Starter : Flour : Water) feeding is one where you add to the starter an equal weight in flour and water. For example, if you take 60 grams (2oz.) of starter, add to it 60 grams (2oz.) of flour and 60 grams (2oz.) of water, you are performing a 1:1:1 feeding.
Once your starter is ready and displays a healthy and consistent activity, you can start using it! In the next section you can find a few tips regarding how to use and preserve the starter, making sure it stays alive strong.
Using and preserving the sourdough starter
Preserving the sourdough starter
Once your starter is ready, you can choose to store it at room temperature or in the fridge. If you choose to store it in the fridge, it’s best to feed your starter outside the fridge, let it reach the peak of its rise and put it in the fridge before it starts declining. It’s also better to use an airtight container if storing it in the fridge.
I also recommend taking a couple of pieces of your starter and putting them in the freezer. Should your sourdough starter die for any reason, you can use one of the frozen pieces to revive it without having to make it from scratch all over again! Frozen pieces of sourdough starter don’t last forever, but will comfortably survive in the freezer for 3 to 6 months, so just remember to replace them every now and then!
Feeding the starter
From now on, how much you feed your starter will depend on where you are storing it and how frequently you want to keep feeding it. If you feed your starter little flour and water (compared to the weight of the starter), it may go hungry in even less than a day. On the other hand, if you discard most of your starter and then feed the remaining part with a good dose of water and flour, it will be able to go without another feeding for even a couple of days. If you are preserving the sourdough starter in the fridge, microbial activity will slow down due to the lower temperature and it will be able to go for 2-3 weeks or even longer without a feeding. It’s important to remember, however, that the time spans I mentioned above may vary based on your home’s temperature, season of the year and general environment. Always let the sourdough starter tell you when it’s hungry.
From here on out, you also don’t have to stick anymore to the feeding quantities I listed above. Those were meant to help keep a consistent feeding while creating the sourdough starter, but now that you have a healthy and active one, you can adjust the feeding quantities based on how much starter you want to keep or your preferred frequency for feedings.
Using the starter
When you follow a sourdough recipe, it will tell you how much starter you need in it. What I recommend is to take some of your starter, move it to a different jar and then feed both of them:
- One jar will be the starter you plan to use in your recipe, which you should feed with enough flour and water to get the amount of starter you need for your recipe. Once this rises as usual, it will be ready to be used in the recipe. For the best result, you should use your starter in the recipe when it’s at the peak of its rise;
- With the other jar, you can do a normal feeding and put it back in its storing place.
This way, we never use our entire starter in a single recipe and we can keep it alive and available for future recipes!
This was a long process, but we are done now! Go and have fun with your personal Sourdough Starter! If you don’t know where to start, why not check out some of my recipes?





Leave a Reply