
Pesto Genovese (or Pesto alla Genovese, as we call it in Italian), is a staple of Italian cuisine and originates from Liguria, a region located in northern Italy. More specifically, this sauce takes its name from the city of Genova. In fact, “Pesto alla Genovese” simply means “Pesto from Genova”.
This is one of my favorite sauces to eat with pasta, I love it’s simplicity and the mix of olive oil and basil gives it a really good taste! Funnily enough, it’s the first thing I chose to write about in this blog. Not only this is really quick to make (in just 15 minutes you can have a plate of pasta with some delicious homemade pesto on the table), but it can also be preserved for a few days in the fridge. This is also naturally a vegetarian and vegan-friendly recipe.
Ingredients
grams of fresh basil leaves
grams of Extra Virgin Olive Oil
grams of Parmigiano Reggiano
grams of pine nuts
grams of Pecorino Cheese
clove(s) of garlic (optional)
Salt as needed
Tools & Equipment
An immersion blender, or, for the real traditional preparation, mortar and pestle
Ingredients
oz. of fresh basil leaves
oz. of Extra Virgin Olive Oil
oz. of Parmigiano Reggiano
oz. of pine nuts
oz. of Pecorino Cheese
clove(s) of garlic
Salt as needed
Tools & Equipment
An immersion blender, or, for the real traditional preparation, mortar and pestle
Now, let’s get right to it!
Tip!
If you are making pasta, now is the right time to put a pot with water on the stove. By the time you’re done making the pesto, your water will already be boiling and ready to cook the pasta!
Tip!
If you want to make the vegan version, you can remove all the cheese and just add a little extra basil and pine nuts, to preserve consistency.
Step 1: Preparing ingredients
Since this is a simple recipe, it does not involve a lot of preparation; all you have to do is:
- Chop the garlic into coarse bits. This is not strictly necessary but it will help in the next step.
- Grate the Parmigiano and Pecorino. Finely grated cheese is best.
Step 2: Making the Pesto Genovese
Toss all the ingredients in the blender’s tall glass or in the mortar, depending on which one you’re using. Salt can be a very subjective matter, so leave it out for now; we’ll be adding that later.
Blender: this is easy! Get the immersion blender and turn it all into a pulp that is as uniform as possible.
Mortar: Slowly work your way towards grinding everything into the smooth sauce we want to prepare. This will take more effort and patience, and remember: you don’t have to beat it, but rather just use the pestle to press the ingredients against the hard bottom of the mortar.
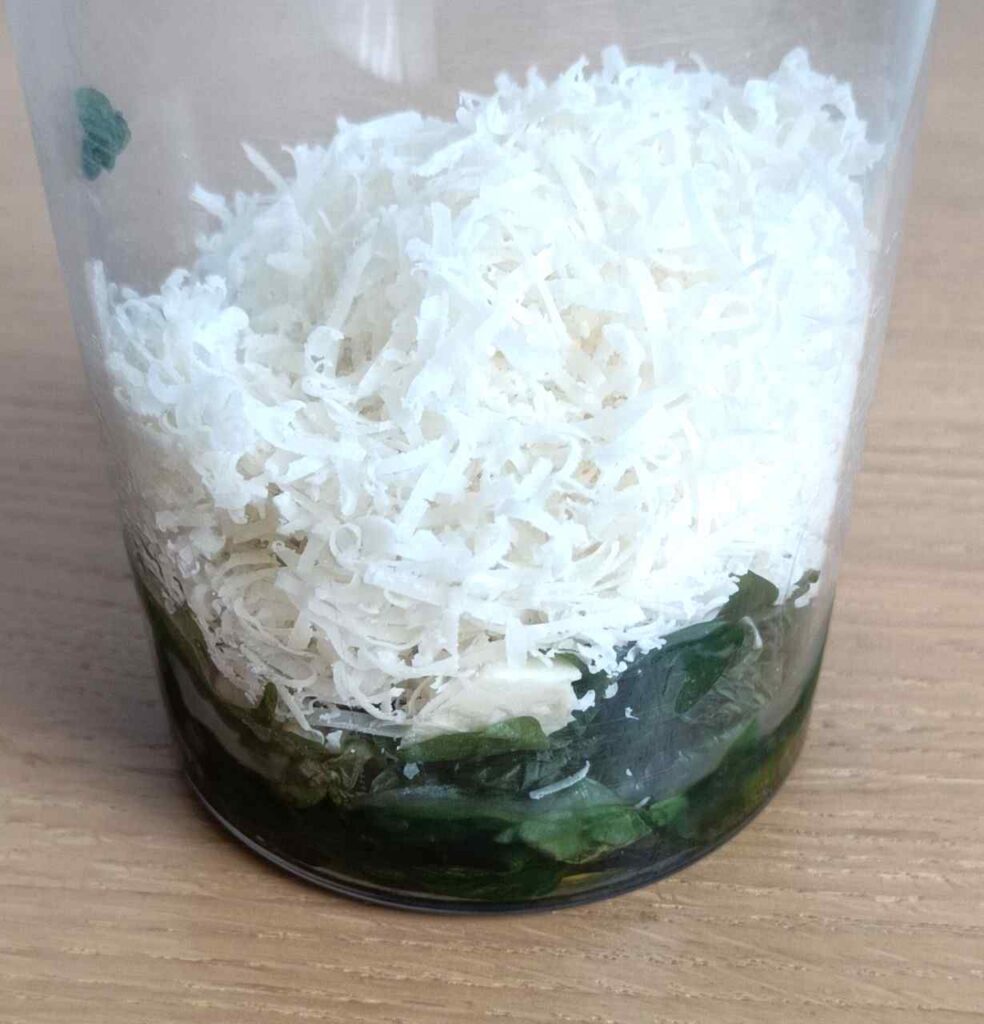
Once you have reached a satisfying creamy consistency, give it a taste and add salt one pinch at a time. A little bit of salt enhances the taste of the pesto but too much might ruin it, hence why we’re adding it a little bit at a time.
And here we are, we have made ourselves some delicious pesto! If you are making pasta, by now the water should be boiling and you’re only a few minutes away from a delicious meal!
Tip!
If you made any extra servings of Pesto Genovese, it can be preserved in a sealed jar in the fridge for a few days. It can even last a few extra days if you add a thin layer of olive oil on top.
Pesto Genovese is traditionally served with a type of pasta called Trofie, but you can choose any kind of pasta of your liking and it will be just as amazing! I didn’t happen to have any Trofie today so I made myself some spaghetti instead and topped it with some Parmigiano.



Leave a Reply