
Saying that Pizza is a staple of Italian Cuisine is an understatement. It’s definitely one of the traditional Italian dishes that is most known and popular also in other parts of the world. At its core, it’s a simple dish, but it’s one that can be endlessly reinvented with flavors and toppings.
As I grew up, making pizza at home has been something we did quite frequently. Not only the result was was always delicious, it was a fun family activity that brought everyone together! Since I moved out of home and even as I now live in another country, I have been keeping up with the tradition and I’ve been trying to make homemade pizza at least once a month! Pizza is also one of these dishes that works quite well if you like to meal prep! Whenever I make pizza, I always make more than we can eat, then divide the leftovers in portions and freeze them. I then just take a portion out of the freezer in the morning when I go to my office and warm it up when I go on lunch break! A nicely made homemade pizza is still a delightful meal even after freezing!
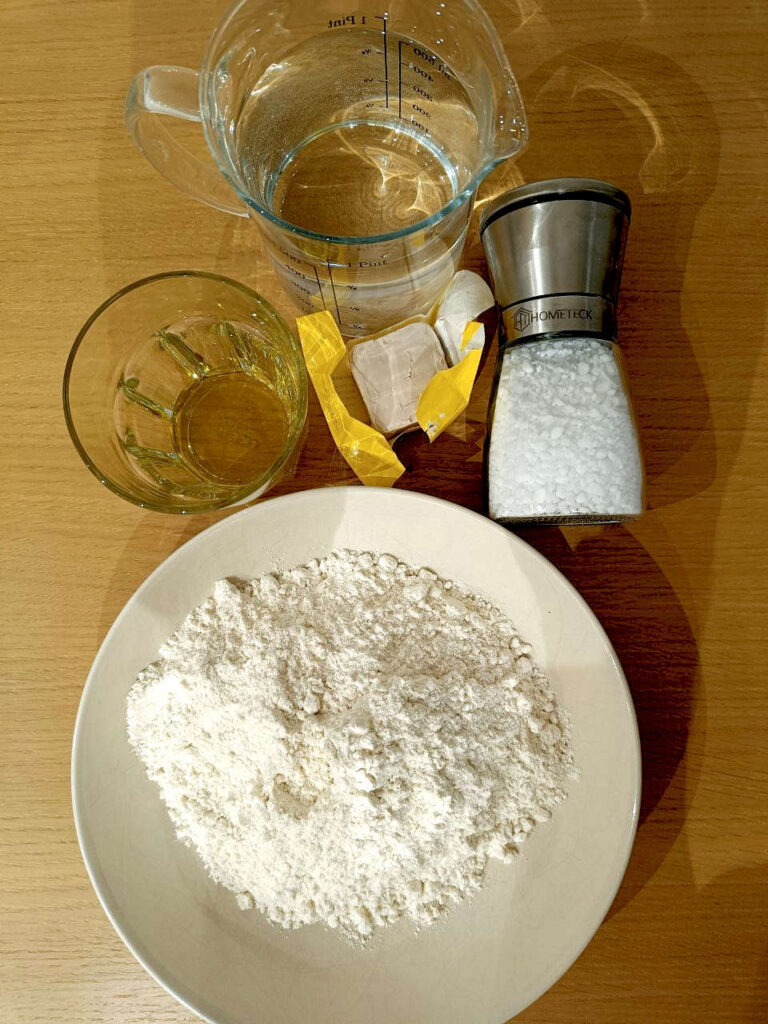
Ingredients
grams of flour
ml of warm Water (25-30C)
ml of Extra Virgin Olive Oil
grams of Salt
grams of fresh yeast
your toppings of choice
Ingredients
lb(s) of flour
tbsp of Extra Virgin Olive Oil
cups of warm Water (~80F)
tbsp of Salt
tbsp of fresh yeast
your toppings of choice
As a point of reference, with a scale of 1 in the recipe above you can comfortably feed 3-4 people, but you won’t have a lot of leftovers! I usually do double that amount (so, choosing a scale of 2 in the selector above), so that I have leftovers for the following days that I can take with me to work!
Pizza Dough Ingredients
With its main ingredients being flour, water, salt, yeast and olive oil, Pizza Dough is quite cheap to make! Besides the base ingredients, you can choose to top your pizza with it with anything you like!
I like to use fresh yeast, as opposed to the dried one. I think it’s easier to measure and personally I like its smell more! After all, it’s what we have been using at home for as long as I can remember and it really brings back memories! Don’t let me bias you, though, dried yeast works too just as fine! If you prefer to use that you should convert the amount of fresh yeast I indicated to the corresponding amount of dried yeast. Producers usually indicate the equivalence in the back of the package.
You might notice that the recipe for the dough is really similar to the one of Focaccia, and you would be right! They are, indeed, very similar, with the main difference being a slightly different Flour/Water ratio.
Toppings
Besides the ingredients for the dough, you are free to use any toppings that you like. Really, anything that suits your taste will work! Here are some of my favorites that I routinely make, if you want to get some inspiration:
- Classic Margherita: Mozzarella, Tomato Sauce and Basil topped with Extra Virgin Olive Oil;
- Marinara: Tomato Sauce and Oregano topped with Extra Virgin Olive Oil;
- Diavola: Mozzarella, Tomato Sauce and Spicy Salame/Pepperoni, optionally topped with a spicy oil (depending on how much fire you like!);
- Four Cheeses (Quattro Formaggi, in italian): Mozzarella, Provola, Gorgonzola, Asiago (or your four cheeses of choice!);
- Mortadella (Italian cured meat), Buffalo Mozzarella and crumbled pistachio topped with Extra Virgin Olive Oil;
- Speck (Italian/German/Austrian cured meat) and Brie (cheese);
- Potatoes (pre-boiled, then crumbled), smoked Provola (cheese) and bacon (or another meat of choice, or no meat at all is delicious too).
I realized while living abroad that having potatoes on pizza is not so common outside of Italy. In Italy it’s quite common, you can find this in most bakeries that also make pizza and it’s always a delicacy! A lot of pizzerias/restaurants also often include a choice of pizza with potatoes in their menu.
Did you know?
Humanity did not fully understand yeast and how it works until quite recently. We have, however, been using it since thousands of years ago! At the very beginning, we even believed it was magic! If you want to learn more about it, check this dedicated post!

Choice of flour
I recommend choosing a wheat flour with a medium/high protein content (for example: bread flour or “Type 00“) for this, as it will greatly help your dough’s strength and contribute to getting an airy and soft Pizza Dough as a result.
Most of the time that goes into making Pizza is spent waiting for the dough to rise, so you should choose the amount of yeast you will use based on when you are able to make the dough and when you will cook it! I often make the dough in the morning, so I can let it rise for 8-12 hours throughout the day then bake it in the evening. I included a leavening time selector in the ingredient list for convenience!
Step 1: Making the Pizza Dough
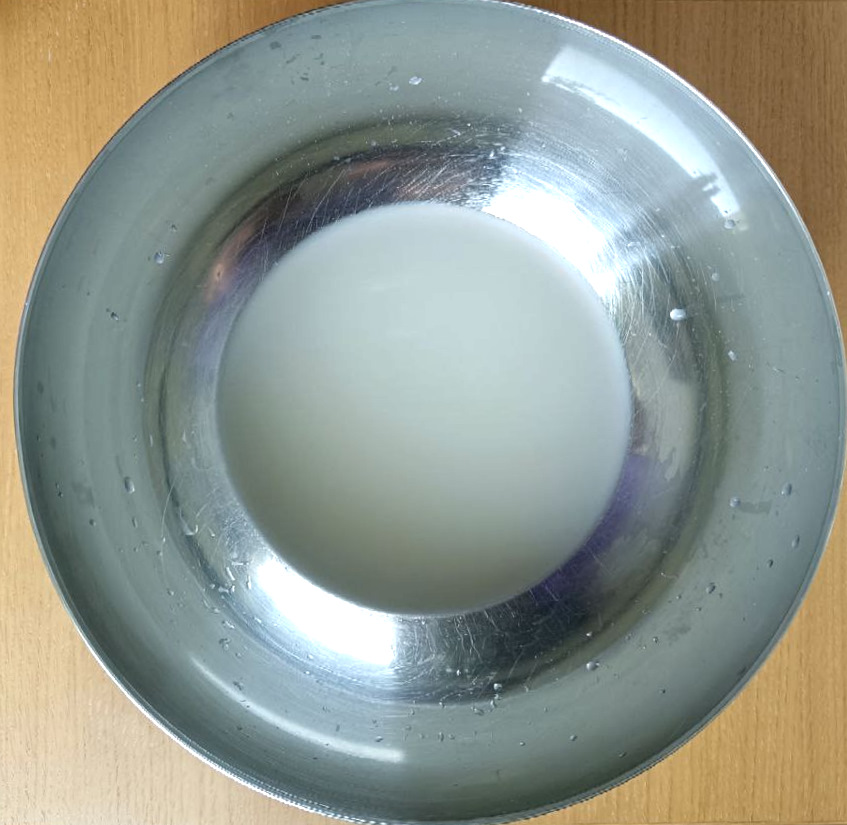
In a bowl, add about 2/3 of the water and the yeast. Mix it gently (with your hands or a fork) until the yeast dissolves in water. It will look like murky water at this point, but don’t worry, it’s how it’s supposed to look!
Now, add in most of the flour (just save a small amount for later) and mix until the water has been all absorbed. If at this point it looks too dry, don’t worry, this is intended and we will fix it soon. We are doing this so that we avoid adding the salt in the same water as the yeast. Salt effectively kills the yeast if it comes into direct contact with it, so much so that it can be called an inhibitor. By using this two-step process, we can have more control on its action and more reliable leavening times.
Mixing Technique!
You can choose to mix the dough using a fork or your hands. Either way, your movement should be one where you lift one side of the dough and fold it onto itself. It’s important to not apply too much force and not overstretch the dough, or it will become gummy and harder to work with.
You can add the salt to the water we left out earlier and mix until it’s all dissolved. Then, you can add the salty water, the remaining flour and the olive oil to the bowl and keep mixing until the dough becomes smooth and uniform in consistency. The dough should be smooth and it should hold together in a nice ball shape. If it doesn’t hold together (and it looks too wet), then it’s fine to add a little bit of extra flour to it. Different flours have different gluten and protein content, so small adjustments to the recipe may be required to attain the right consistency. You can use the image below as a reference!
Tip!
To avoid the dough from sticking a lot to the sides of the bowl, you can put a little bit of olive oil on a napkin and use it to oil the sides of the bowl. This will make the next steps easier and the bowl easier to clean later on!
(Optional) Step 2: Stretch and folds
This is an optional step, but doing this can contribute a lot to strengthening gluten bonds in your dough. This will make it able to retain air bubbles better, allowing it to rise more and making your Pizza Dough easier to work with later, as well as more airy and soft. After 30 minutes since you set the dough to rest, you can perform the first set of stretch and folds.
How to perform a Stretch and Fold
To perform a stretch and fold, you can:
- Fill a small bowl with water and wet your fingers. This will prevent the dough from sticking to your hands;
- Lift the dough from one side and gently fold it onto itself (all the way to the other side);
- Repeat for different sides of the dough, up to 4-8 folds in total.
As you do the folds, you will notice that your dough will start feeling harder to the touch. This is normal, it will soften up again as we let it rest. On the flip side, your dough will also look pleasantly smoother after some stretch and folds.
How to perform a Stretch and Fold
Repeat this process every 30 minutes for 1 to 2 hours (up to 4 sets of stretch and folds in total). After this is done, just let your dough rest until the end of the first rise. The time it takes will depend on the amount of yeast you have used. If you used the leavening time selector above, you can refer to that, otherwise you can keep an eye on the dough and consider the first rise done when the dough has more than doubled or tripled in size.
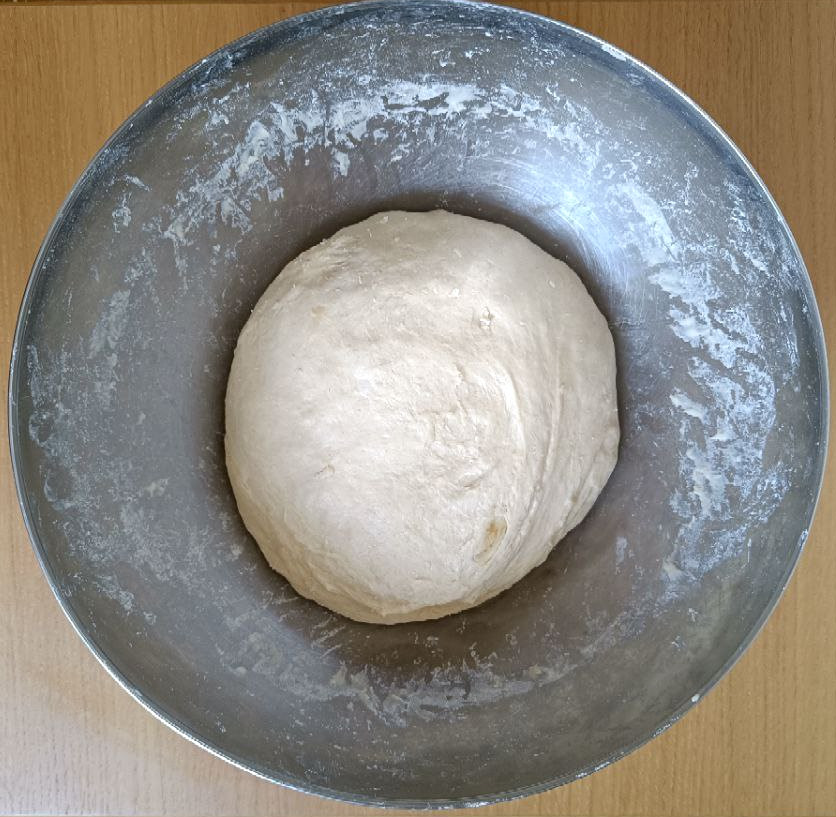
Upon completing its first rise, your dough will look like in the picture below:
If you read our Focaccia recipe, you will notice that this looks slightly less wet and sticky. This is due to the slightly reduced water content; the difference in quantity is actually not so large, but it has a visible effect on the result!
Step 3: Take the Pizza Dough out of the bowl
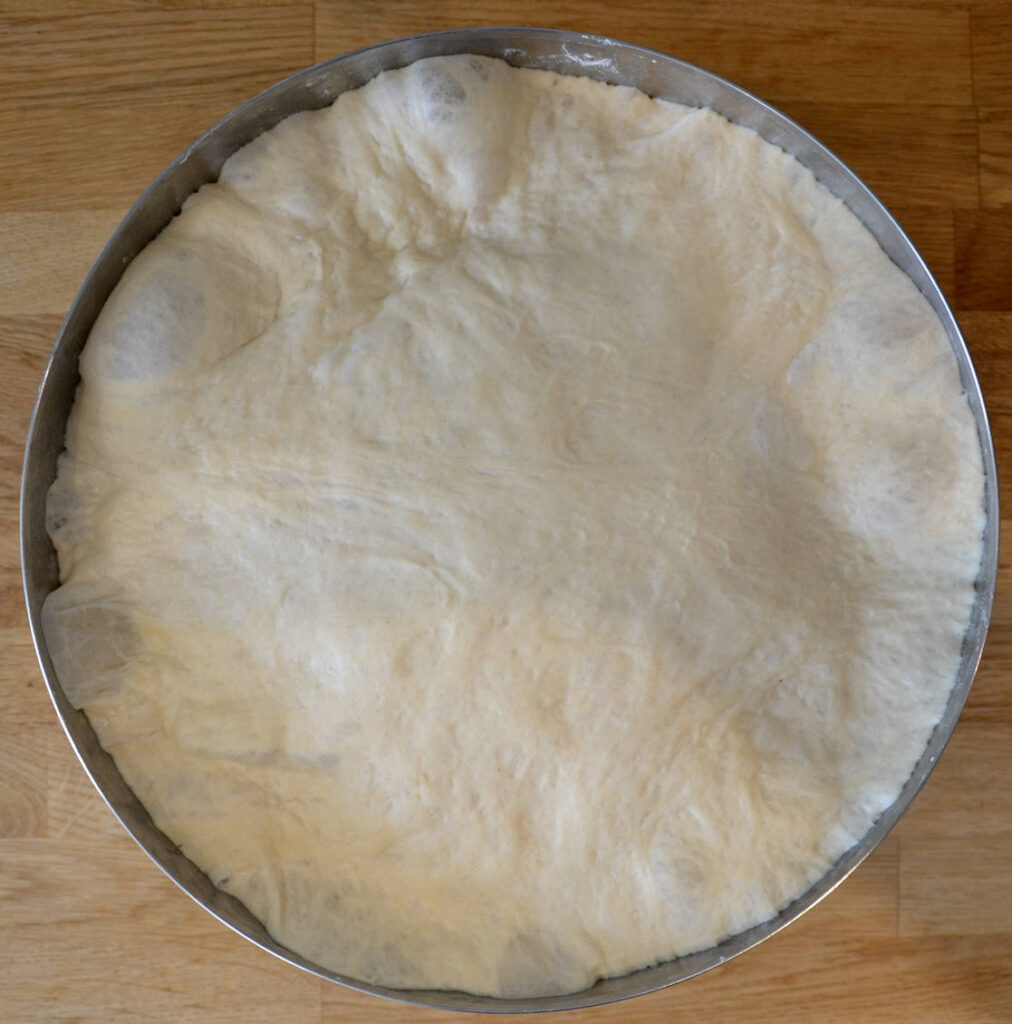
Your dough has now completed its first rise. You can get the sheet pans you will use for baking and add a little bit of Olive Oil to them. Spread it well in order to create a thin layer of oil; this prevent the dough from sticking. You can proceed to divide your dough among the sheet pans directly (based on the size) and spread it gently with your hands – without forcing or ripping it. Alternatively, you can also put some flour on the table and spread the dough there before moving it to the sheet pan. If you use a rolling pin, don’t put too much pressure on the dough, or you’ll risk releasing a lot of the air bubbles we worked so hard to keep inside the dough!
You now have a choice: you can directly move to the baking part, or we can let the dough do a second rise! Check out the pictures in the next section to have an idea of the benefits of a second rise!
(Optional) Second rise
If we let the dough rest for another 45-60 minutes, it will become a little softer and further develop some extra air bubbles, which will lead to a better result overall. The second rise also makes it become a little easier to spread further and cover the entire sheet pan (in case it hasn’t covered it all yet)!
Personally, I get my best results when I let the dough do a second rise! Plus, I use the time to start preparing all the toppings and warming up the oven, so I really don’t spend too much time waiting.
You can see in the pictures below how I was able to spread my dough further after the second rise. I didn’t encounter any resistance at all and the dough felt very workable and soft!


Step 4: Topping the Pizza
Preheat your oven to the highest temperature it can reach! My oven can reach 300C (572F), but lower temperatures (such as 220C-250C or 428F-482F) can also work! The process from here is simple: while your oven heats up, start adding the toppings to your pizzas, and then we are ready to go!
Tip!
Personally, I don’t like when my pizza toppings burn. I like my mozzarella and other cheeses gently melted the other toppings still tender! For this reason, I often add the cheese and the more delicate toppings mid-baking, when the dough is starting to gain some color. This is not mandatory of course, it’s more of a matter of preference!
Today, these are the pizzas I decided to make:
- One large pizza, half margherita and half margherita with salame;
- Another large pizza with potatoes, but half of it with rosemary and Brie (cheese) and the other half with Brie and ham (prosciutto);
- A small pizza with Asiago (cheese) and cooked ham.
Following the tip above, I left out the most delicate toppings at the beginning and put the pizzas in the oven.
Step 5: Baking
Has the oven reached temperature? Nice, it’s time to bake! Pizzas will cook fast, especially at higher temperatures, so do keep an eye on it to avoid them burning! If you are baking multiple pizzas at the same time, you might need to swap the one in the upper side of the oven with the one in the bottom mid-baking so that they bake evenly. You will notice this is needed when you see the the pizza on top is starting to gain color while being undercooked in the bottom and vice versa for the bottom pizza!

Mid-baking, I then added the missing toppings:


When putting them back in the oven, I also swapped the pizza that was initially on top (the one with potatoes) with the one that was initially in the bottom (the margherita), so that they both bake evenly! From here, it only took a few minutes for them all to be ready.


Congratulations, we are done! Serve, enjoy and make sure to brag about your delicious pizza!
Leave a Reply